
1962 Gibson J-50
Partial Brace Replacement | Refret | New Bridge | New Saddle & Nut | Misc. Repairs

Pre-repair. Glam shots are always necessary for guitars like this.


Initial diagnosis on bracing issues. Once I got this far, I decided the best call was to pop off the back and make the necessary repairs that way. Thank goodness the client okayed it -- what's pictured here ended up only being a fraction of what the interior needed.

It ain't easy bein' this fret cheesy.

This was the gnarliest section of the guitar. Failed upper transverse brace + shrinking pickguard did quite a number on the upper bout.

Someone clearly has already worked on these braces. Maybe the repairs were solid at the time, but they certainly weren't now.

Oof. That ain't right. The upper transverse brace is too small, broken, barely holding on, and more glue than wood at this point. Popsicle brace needs to be re-glued, but it's in decent shape.

Starting to clean up the upper bout. I'd also removed the pickguard and cleaned up the old glue living in the massive crack at this point, so things we're already coming together much better.

The neck block had come loose from the top -- mostly on the treble side of the crack, but also a little bit on the bass side. Here, I'm re-gluing it all back in place. I'll deal with the crack itself later.

The back. The three upper braces were loose for well over half of their length, so I ended up removing completely and re-gluing. They all came off cleanly, but strangely the lowest brace was totally solid. Those cleats also have to go.

A little further clean up. At this point, I'd decided to reglue the entirety of the top braces since there were so many loose sections and I was not confident that anything but starting from scratch would last the long haul.

The height of the X-brace, and in my opinion, probably the culprit behind the mess of loose bracing. There's no one-size-fits-all for bracing, but I just didn't feel good about putting this back in the guitar (plus the X was broken in a couple sections). I chatted with the client and we decided to install a new X brace, which I shaped nearly identical to the original -- only increasing the height to about 14.5mm.

The top all ready to go. I ended up replacing the X, UTB, and bridge plate (original was warped and had a crack running across all the pin holes). I also cleaned up the slathers of glue running along the cracks and installed some cleats for assurance they won't open back up.

Pre & post. The horrible crack in the upper bout is in great shape now. In addition to the new, larger UTB and re-glue of the popsicle brace, I added a splint to fill the crack and a cleat between the UTB and popsicle brace. The crack is now totally flush and is not going to open back up.

Pre & post. Didn't have to replace any bracing, but I did replace the existing cleats and added some new ones. The upper-most cleat is a little larger than the others because it's spanning two smaller cracks very close to each other.

Last thing before closing the box is to reinforce a couple sections of the sides near the tail block. The one on the left was for impact damage -- the one on the right was for an input jack that I was asked to remove, but the hole is still there for a future jack installation.

Body is closed back up and frets are installed.

Prepping the bridge footprint. The Spruce plugs were to fill the large holes from the famous Gibson adjustable bridge -- I had done this prior to gluing the bridge plate.
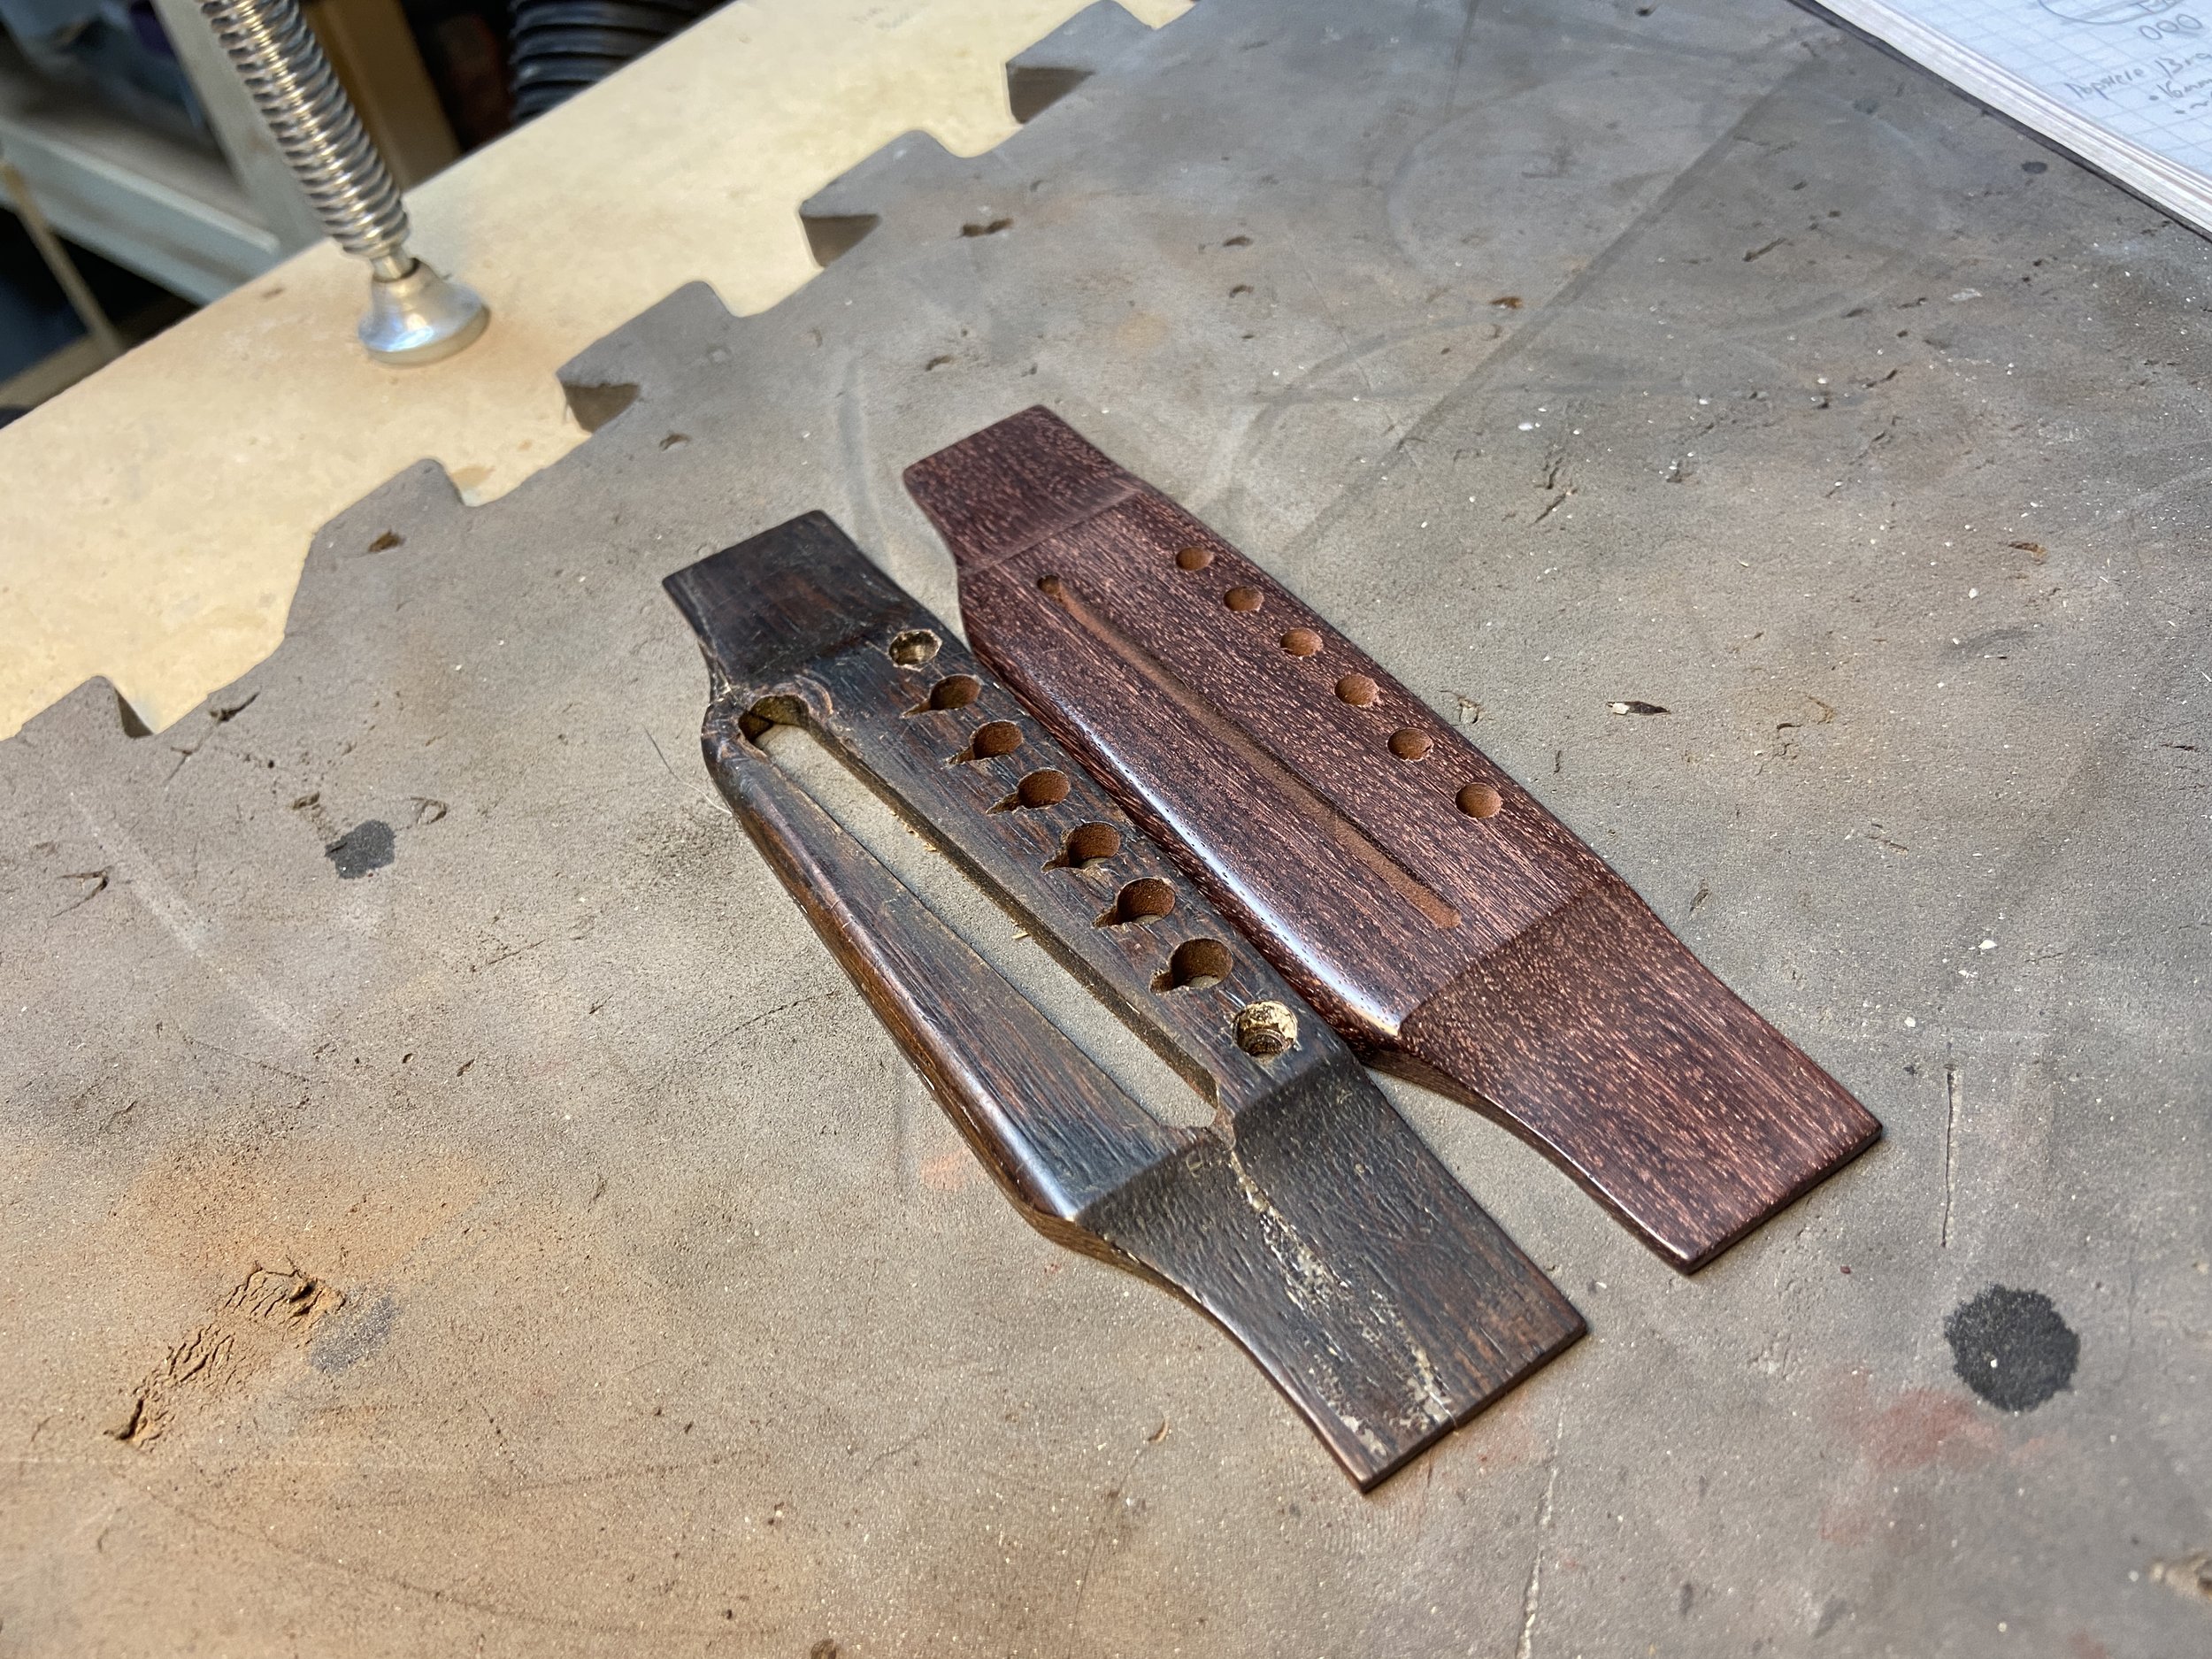
Original vs. new bridge

New bridge installed and ready for strings. The clamp you see on the left is for adding another cleat in a fragile, peninsula-like section of the extremely worn soundhole.

Intonating the new saddle. The neck is right on the edge of needing a reset but the client wanted to wait for the time being. Thankfully we were able to get it to a comfortable action without sacrificing too much with the string break angles. I added some ramps in the string slots to help increase the angle.

All packed up and ready to go home.